
Ticket Management
Create, assign, update, and resolve support tickets. Understand how statuses, priorities, and ticket types work together to keep your queue organized.
The ticket list
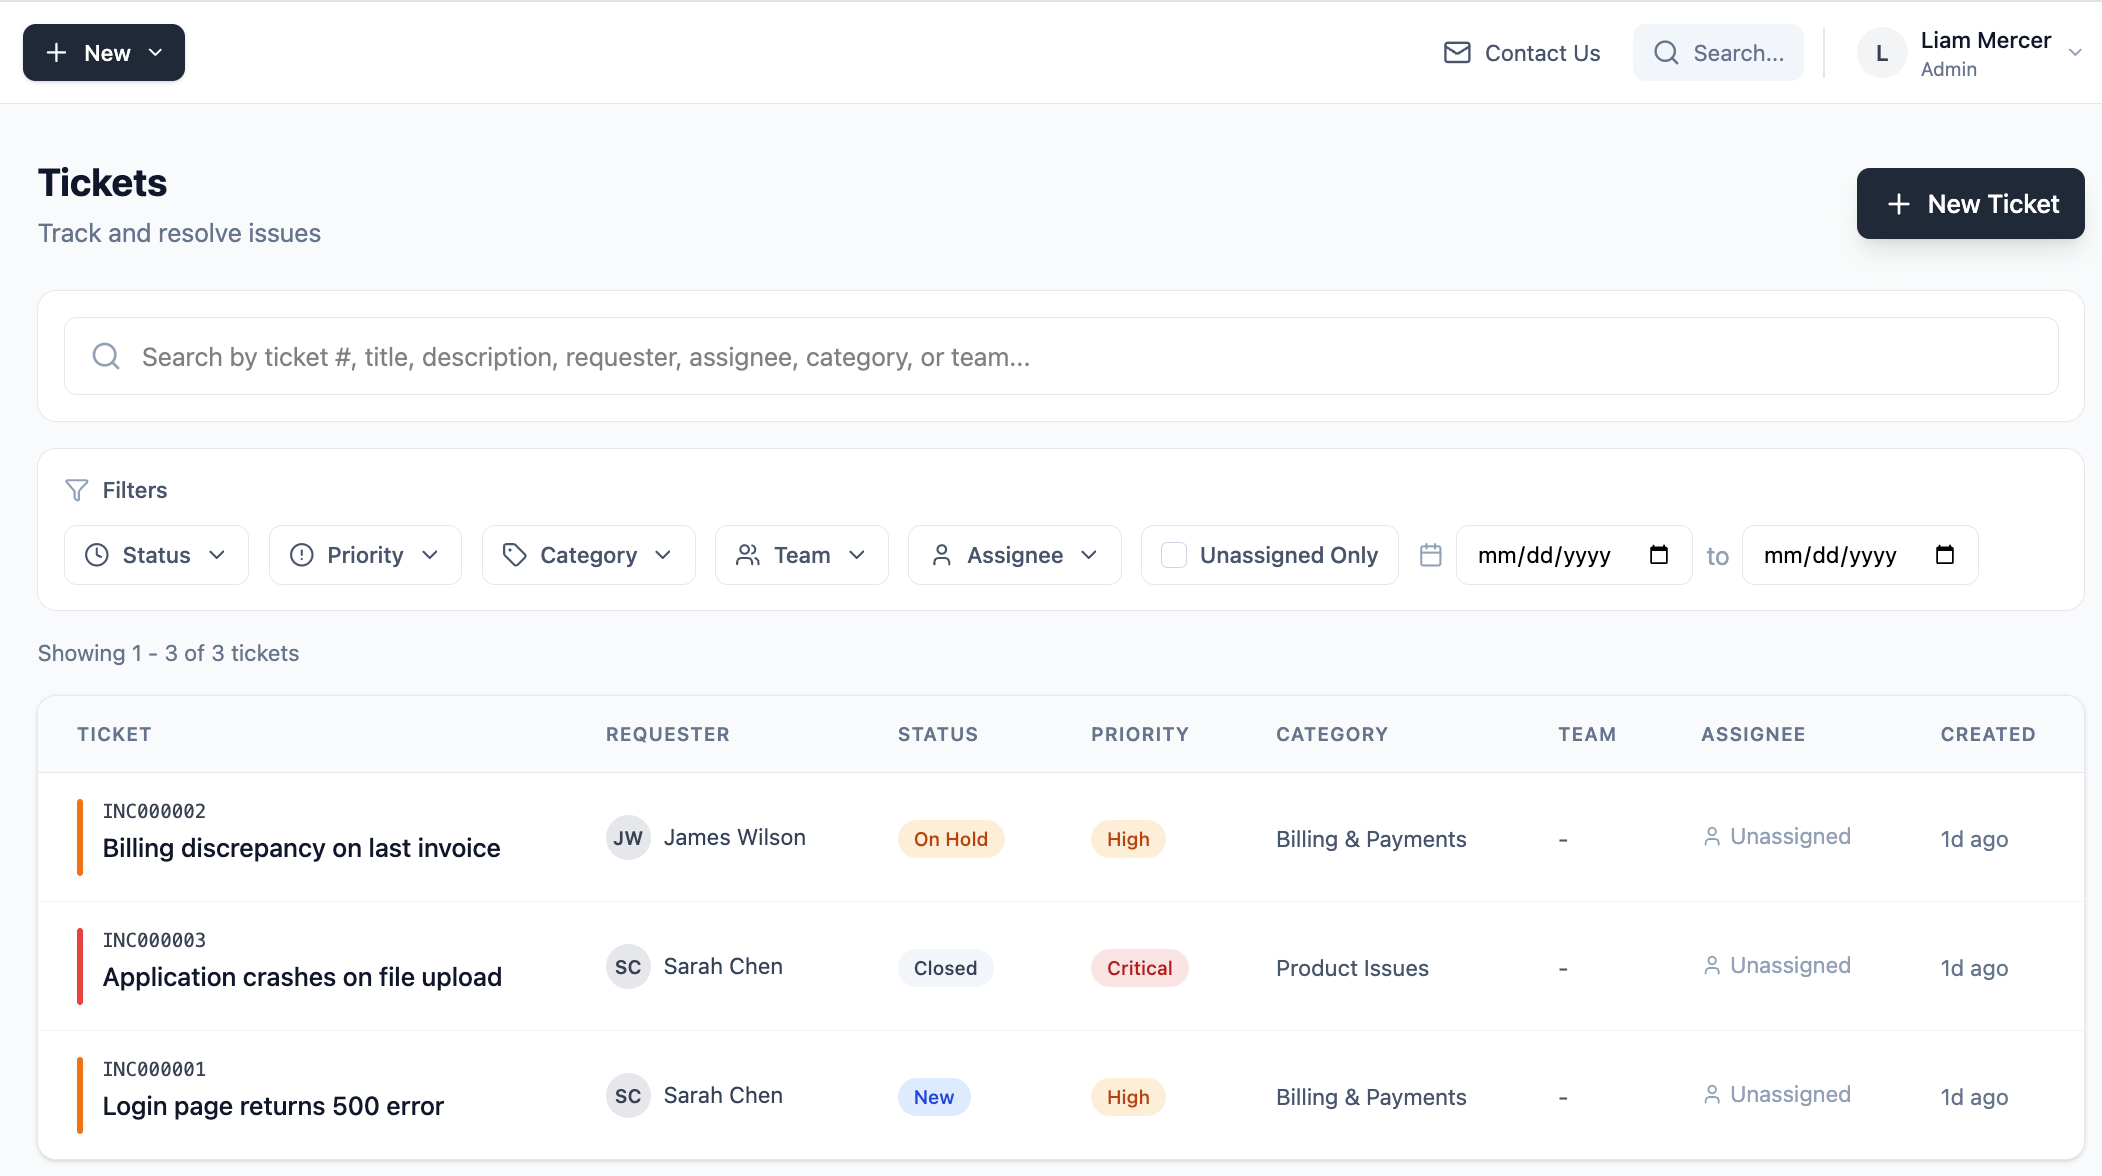
The Tickets page is your main queue for work you are allowed to see. Use search, sorting, and filters to narrow it by status, priority, type, assignee, and other fields. If SLA targets are enabled, tickets may also show progress toward their targets. The AI view, when available, prioritizes eligible open work without changing ticket status.
Ticket types
Every ticket has a type that describes the kind of work it represents:
Ticket statuses
Status tracks where a ticket is in its lifecycle. A ticket moves through these statuses as your team works on it:
Ticket priorities
Priority reflects how urgently a ticket needs to be addressed:
- Critical — Service is completely down or a major customer is severely impacted. Needs immediate attention.
- High — Significant impact, needs to be addressed soon.
- Medium — Standard priority. Normal workflow.
- Low — Minor issue or informational. Can be addressed when there is capacity.
Creating a ticket
Use New or the create action on the Tickets page, depending on your layout and permissions. Fill in the title, type, priority, and description. You can optionally assign the ticket, link a contact, and add a category when those fields are available to you.
The ticket detail view
Click any ticket to open the detail view. This is where your team does most of their work — updating status, adding comments, reassigning, and tracking the full history of the ticket.
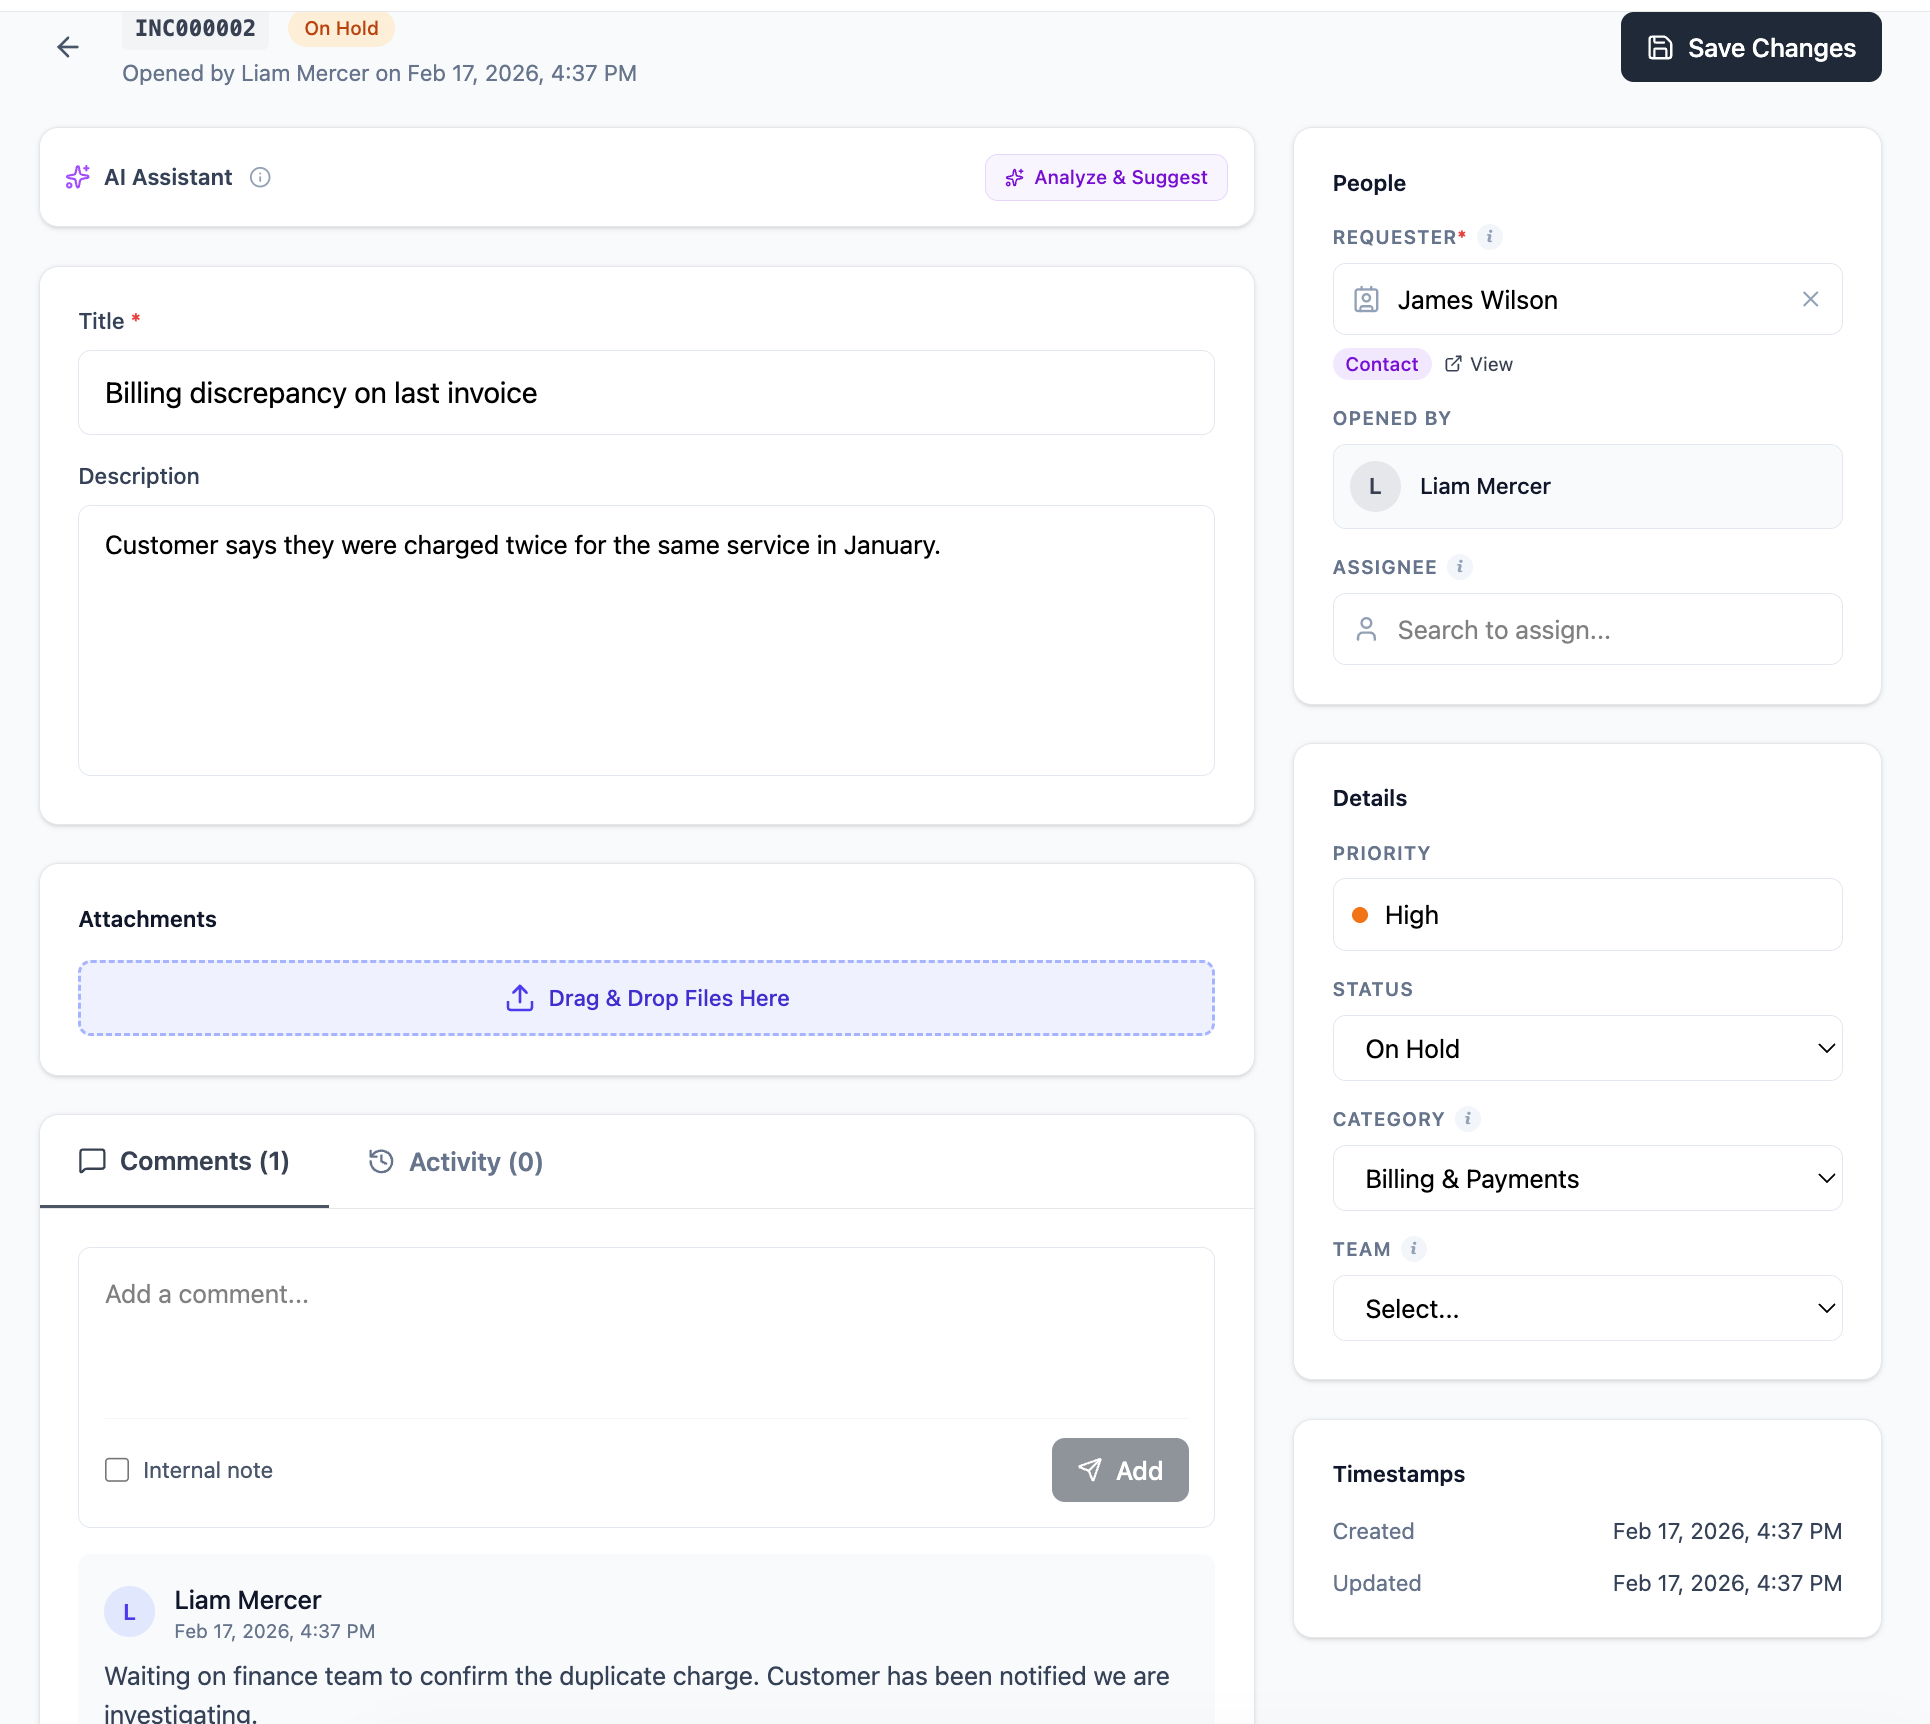
The detail view includes:
- Ticket fields on the right — status, priority, type, assignee, requester, category, and dates
- Description — the original ticket content
- Comments — threaded conversation between agents (and customers for portal/email tickets)
- Activity log — a full audit trail of every change made to the ticket
- Attachments — files uploaded to the ticket
Assigning tickets
Open a ticket and use the Assignee field in the People panel to give it an owner. Depending on workspace permissions, you may also be able to set a team or co-assignees. Notification delivery depends on the recipient's settings and the workspace's notification rules.
Adding comments
Use the Comments tab to add a message. Check Public reply when the message should be customer-facing; leave it off for an internal note. Review the choice before selecting Add, especially if your draft contains information that should stay inside your team. A public reply may be delivered through the ticket's connected customer channel, while an internal note is not sent to the requester.
Closing and resolving tickets
Use Resolve when the work is finished and document the outcome in the Resolution tab. Your workspace may require resolution notes before the action can complete. Closed is a later final state; direct closing can be restricted by workspace policy. A reply by itself does not resolve a ticket—it may simply mean the team is waiting for the customer. Resolved and closed tickets remain available for history and reporting, subject to your permissions.
Filtering your queue
Use the filters at the top of the Tickets page to narrow down your view. You can filter by status, priority, ticket type, assignee, and category. Combine filters to create focused views — for example, all Critical tickets assigned to you that are In Progress.
Frequently asked questions
Can I delete a ticket?
Use Resolved or Closed to mark completed work rather than trying to remove it. If a ticket was created in error or contains sensitive data, ask an administrator about your workspace's permitted correction or retention process.
Can I reassign a ticket to someone else?
Usually. Open the ticket and change the Assignee field if your role and the ticket's state allow it. Available assignees are constrained by your workspace's teams and permissions.
What is the difference between Resolved and Closed?
Resolved means the work has been completed and the outcome documented. Closed is the final lifecycle state. Your workspace can restrict direct closing or lock tickets in either state, so follow its configured workflow rather than skipping straight to Closed.
Can End Users see all tickets?
No. Visibility follows the account's role, workspace permissions, team rules, and relationship to the ticket. Do not assume that every agent can see every ticket in the organization.